Git & GitHub from a DevOps Perspective: What I Learned Beyond the Commands
Tech learner with Core Java experience, revising DSA & DBMS while diving into Cloud, DevOps, and modern tools like Docker, Kubernetes & Azure
Introduction
I thought I already knew Git and GitHub.
I had worked with GitHub before, mainly through GitHub Desktop, where many operations were just a few clicks away.
Commit. Push. Pull.
Simple.
But while revisiting Git and GitHub from a DevOps perspective, I decided to work more through the command line.
And that changed my understanding completely.
Because this time, I wasn't just clicking buttons.
I started seeing what was happening underneath:
What is Git tracking? Where are my changes? Which branch am I on? What is happening locally? What is happening on the remote repository? Why is Git rejecting my command?
And then Git started giving me some very practical lessons.
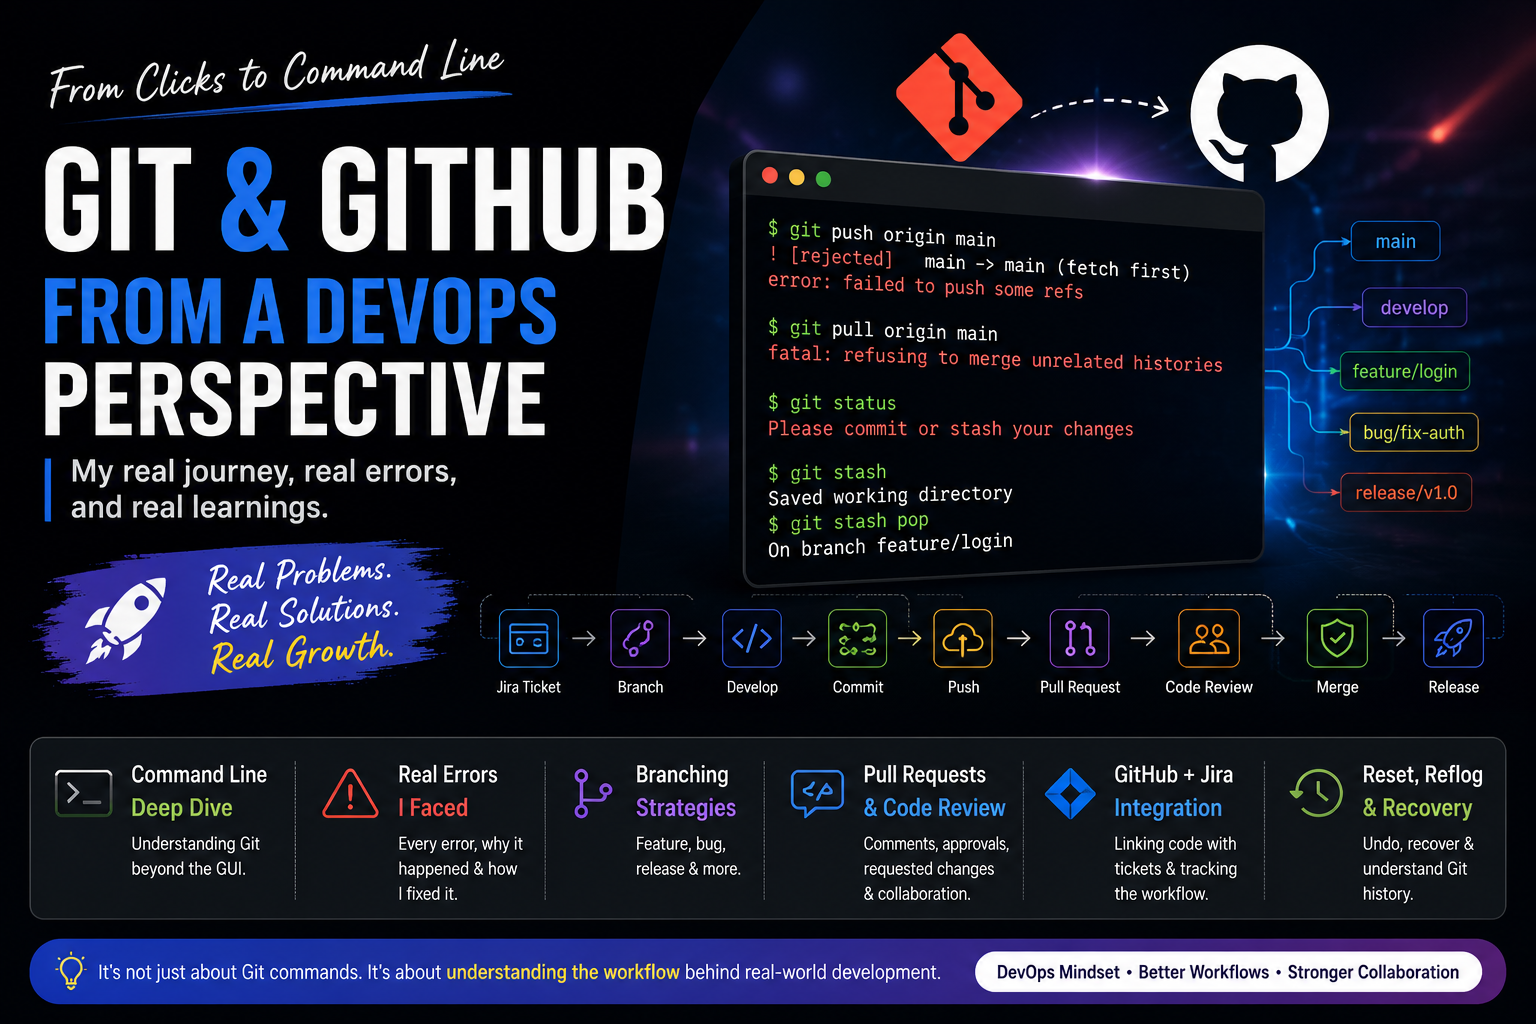
I encountered errors like:
Authentication failed
! [rejected] main -> main (fetch first)
refusing to merge unrelated histories
Please commit or stash your changes
And instead of treating these errors as problems to get rid of, I started treating them as explanations of what Git was trying to tell me.
This blog documents what I learned.
1. Git vs GitHub
Before going into commands, I wanted to understand the difference clearly.
Git
Git is a version control system.
It helps us track changes in our code and maintain its history.
GitHub
GitHub is a platform where Git repositories can be hosted remotely and where teams can collaborate around the code.
A simple way to visualize it:
Developer's Machine
        |
       Git
        |
        ↓
Local Repository
        |
      Push
        ↓
GitHub Repository
Git manages the version history.
GitHub provides the remote collaboration platform.
2. The Git Workflow
One of the most important concepts I learned was that a file does not simply go directly from "edited" to "committed."
There are different stages.
Working Directory
        ↓
     git add
        ↓
Staging Area
        ↓
   git commit
        ↓
Local Repository
        ↓
    git push
        ↓
Remote Repository
Working Directory
This is where I actually modify my files.
For example:
git status
can show:
modified: file.txt
This means the file has changed, but the change has not yet been staged.
3. git status
One command I learned to use frequently is:
git status
It tells me the current state of my working directory and staging area.
For example:
modified: file.txt
means:
The file has changed, but the change isn't staged yet.
After:
git add file.txt
the status can show:
Changes to be committed:
    modified: file.txt
Now Git knows that this change is intended for the next commit.
4. Staging Area
The staging area was an important concept for me.
Think of it as a preparation area.
Working Directory
"These files changed."

        ↓ git add

Staging Area
"These changes should go into the next commit."

        ↓ git commit

Repository
"These changes are now part of history."
For example:
git add calculator.sh
or:
git add .
Then:
git commit -m "Update calculator"
5. git diff
Another useful command is:
git diff
It helps inspect what actually changed in files.
This becomes especially useful when working in a team because sometimes you know that something changed, but you need to see exactly what changed.
6. git log
Git also maintains history.
git log
can be used to inspect previous commits.
This becomes very useful when you want to understand:
What changed?
When did it change?
Which commit introduced the change?
What was the project like before?
In a team environment, Git history can help investigate when a change was introduced.
7. Git Tracks Changes
One interesting concept I learned was how Git tracks files.
If a tracked file is modified or deleted, Git can identify that change.
For example:
git status
can show that a file was modified.
And:
git diff
can help inspect the changes.
This made me understand that Git isn't simply "uploading files."
It is maintaining a history of changes.
8. Initializing a Repository
One way to start tracking a local project is:
git init
This creates a Git repository in the project.
Then we can connect it to GitHub:
git remote add origin REPOSITORY_URL
Then:
git add .
git commit -m "Initial Commit"
git push origin main
At this point, the local project can be pushed to the GitHub repository.
9. git init vs git clone
I also learned that there are different ways of getting a project locally.
git init
Usually used when you already have a local project and want to start tracking it with Git.
git init
git clone
Used when a repository already exists remotely and you want to create a local copy.
git clone REPOSITORY_URL
This is commonly how developers start working with an existing organizational repository.
10. Remote Repository and origin
When working with GitHub, we often see:
origin
For example:
git push origin main
Here:
origin= remote repository referencemain= branch
The remote can be inspected/configured using Git's remote commands.
The important idea is:
Local Repository
      |
      | origin
      ↓
GitHub Repository
11. My First Real Git Problem: master vs main
This was one of my first practical lessons.
I ran:
git init
I expected my local branch to be:
main
But my local repository had:
master
Then I tried:
git push -u origin main
But the local main branch didn't exist.
So I renamed the branch:
git branch -M main
After that, I could work with:
git push -u origin main
Lesson
I learned that before running a Git command, I should understand the current repository state.
Don't assume.
Check.
12. Authentication failed
After solving the branch issue, I encountered another problem:
Authentication failed
What made it interesting was that Git wasn't simply asking me for a username and password.
I had to look at the credential/authentication side of the setup.
I checked Windows Credential Manager and removed the old GitHub credentials.
Then I tried pushing again:
git push -u origin main
A Git Credential Manager authentication window appeared.
I used the browser-based sign-in flow.
Lesson
This taught me that Git operations can fail because of authentication configuration, not because of the project itself.
13. git push — What Does It Actually Do?
Once the local commit exists, we can send it to the remote repository:
git push origin main
Conceptually:
Local Commit
     ↓
   Push
     ↓
GitHub
But pushing isn't always successful.
And that led to another real error.
14. fetch first
I tried pushing and got:
! [rejected] main -> main (fetch first)
At first, this looks scary.
But the reason was simple:
The GitHub repository already had a commit that my local repository did not have.
In my case, the remote repository had its own initial content while my local project had its own history.
So Git was essentially saying:
"Your local history doesn't contain everything that exists remotely."
The next concept I had to understand was:
git pull origin main
15. What Does git pull Actually Do?
A useful mental model is:
git pull
   =
git fetch
   +
integration
The official Git documentation describes git pull as fetching from a remote and then integrating the remote changes into the current branch.
So:
git pull origin main
means:
Bring the latest changes from the remote
mainbranch and integrate them into my current local branch.
16. git fetch vs git pull
This distinction became important.
git fetch
git fetch origin
Fetches information/updates from the remote without performing the same integration step as pull.
git pull
git pull origin main
Fetches and then integrates the remote changes.
A simple way to remember:
fetch
↓
"Show/bring me what changed remotely."

pull
↓
"Bring it and integrate it into my current branch."
17. unrelated histories
After trying to pull, I encountered another situation:
refusing to merge unrelated histories
This happened because my local project and remote GitHub repository had separate histories.
For example:
Remote:
README Commit
     ↓
     B


Local:
Laravel Initial Commit
     ↓
     Y
There was no common ancestor between the two histories.
Git therefore refused to merge them automatically.
The command discussed in my notes was:
git pull origin main --allow-unrelated-histories
This tells Git to allow the integration of those separate histories.
18. Merge Conflict
After allowing the histories to be merged, another practical concept appeared:
CONFLICT (content): Merge conflict in README.md
Automatic merge failed.
Git had found conflicting changes in the same file.
The file could contain conflict markers such as:
<<<<<<< HEAD
Local content
=======
Remote content
>>>>>>> main
I had to decide which content should remain and remove the conflict markers.
Then:
git add README.md
followed by:
git commit -m "Resolve merge conflict"
and finally:
git push -u origin main
Lesson
A merge conflict is not Git "breaking."
It means Git needs a human decision about which changes should be kept.
19. Branches
Then I moved deeper into branching.
A branch can be thought of as a separate line of development.
Instead of every developer working directly on the same branch:
main
 |
 +--- Developer A
 |
 +--- Developer B
 |
 +--- Developer C
we can separate work:
main
 |
 +--- feature/login
 |
 +--- feature/payment
 |
 +--- bug/fix-auth
This allows different work to happen independently.
20. Branching Strategy
In a real project, branching is not just:
"Create random branches."
There is usually a strategy.
For example:
Feature Branch
      ↓
Development
      ↓
Testing / Review
      ↓
Develop
      ↓
Release Branch
      ↓
Production
The exact strategy depends on the organization, but the important idea is separation of development, integration, and release work.
21. One Ticket → One Branch
One of the most important workflow rules from my notes was:
One ticket → one branch
For example:
Jira Ticket
     ↓
Create Feature Branch
     ↓
Work on Ticket
     ↓
Finish Work
     ↓
Pull Request
     ↓
Code Review
     ↓
Merge
Once the ticket is complete, that work goes through the review/merge process.
When a new task arrives:
New Ticket
    ↓
New Branch
This keeps tasks separated and makes the history easier to understand.
22. Keeping a New Branch Updated
Before starting work on a new task, the branch should be brought up to date with the relevant development code.
Conceptually:
develop
   ↓
latest code
   ↓
your new branch
   ↓
your development
This reduces the chance of developing against an outdated codebase.
23. Feature Branches
Feature branches are used to isolate feature development.
For example:
feature/user-login
feature/payment
feature/dashboard
Developers can work independently and later submit their work for review.
24. Bug Fix Branches
The same idea can be applied to bugs.
For example:
bug/login-error
bug/payment-validation
bug/api-response
This keeps bug-fixing work separate from unrelated development.
25. Release Branches
Another concept I learned was the release branch.
Why not just release directly from the active development branch?
Because the development branch may still be changing.
A release branch gives a more controlled place for:
testing
stabilization
final fixes
release preparation
Conceptually:
Feature Development
       ↓
Main / Develop
       ↓
Release Branch
       ↓
Testing
       ↓
Release
       ↓
Users
The idea is to keep the code being tested stable while active development continues elsewhere.
26. Feature Branch Cleanup
After a feature has been completed and merged, the feature branch can be deleted according to the team's workflow.
For example:
feature/login
     ↓
Pull Request
     ↓
Review
     ↓
Merge
     ↓
Delete feature branch
27. Fork
Another GitHub concept I learned was forking.
A fork is essentially creating your own copy of another repository under your GitHub account.
For example:
Original Repository
        ↓
       Fork
        ↓
Your GitHub Repository
        ↓
Your Changes
        ↓
Pull Request
        ↓
Original Repository
This is particularly useful when you don't have direct write access to the original repository.
My notes used an open-source project such as Kubernetes as an example of a project with many contributors.
28. SSH vs HTTPS
When cloning a repository, GitHub can provide different connection methods.
One important distinction I learned was:
HTTPS
Repository URL uses HTTPS.
SSH
Repository URL uses SSH.
If using SSH, an SSH key needs to be configured.
This led me to another practical topic.
29. SSH Key Generation
For SSH-based GitHub access, I learned about generating an SSH key.
A command discussed in my notes was:
ssh-keygen -t rsa
The key generation process creates the key files in the user's SSH directory.
The important concept is:
Local Machine
     ↓
SSH Key
     ↓
GitHub Authentication
     ↓
Repository Access
So when an SSH clone failed because the required key wasn't configured, the error wasn't about the repository code.
It was about authentication.
30. Local Integration vs Remote Integration
This was another concept I found useful.
Local Integration
For example:
git checkout develop
git merge feature-branch
The merge happens on the local machine.
feature-branch
       ↓
     merge
       ↓
develop
GitHub doesn't automatically create a Pull Request just because you performed a local merge and pushed the resulting develop branch.
Remote Integration / Pull Request
Instead:
git push origin feature-branch
Then create a Pull Request on GitHub.
Now the team gets a review process.
31. Pull Request
A Pull Request is more than just a way to merge code.
It creates a collaboration and review point.
Typical flow:
Feature Branch
      ↓
     Push
      ↓
Pull Request
      ↓
Code Review
      ↓
Changes / Approval
      ↓
Merge
32. Code Review
The reviewer can inspect changed files and comment on specific parts of the code.
A review can result in:
Comments
Suggestions or observations.
Approve
The reviewer is satisfied with the changes.
Request Changes
The developer needs to make modifications.
If changes are requested:
Reviewer
   ↓
Request Changes
   ↓
Developer fixes code
   ↓
Push again
   ↓
Reviewer checks again
This creates a controlled path toward merging code.
33. Why Pull Requests Matter in DevOps
This was an important shift in my understanding.
A direct local merge is:
Developer
   ↓
Local merge
   ↓
Push
A Pull Request workflow is:
Developer
   ↓
Feature Branch
   ↓
Pull Request
   ↓
Code Review
   ↓
Checks / Testing
   ↓
Approval
   ↓
Merge
The second workflow introduces collaboration, review, discussion and automated checks where configured.
That is why Pull Requests fit naturally into professional development and DevOps workflows.
34. GitHub + Jira
Another important part of the workflow was connecting development work with project/task tracking.
The idea was:
Jira Ticket
     ↓
Development Branch
     ↓
GitHub
     ↓
Pull Request
     ↓
Code Review
     ↓
Jira Subtask / Tracking
The Pull Request link can be added to the relevant Jira subtask.
The review status can then be tracked as part of the team's work.
35. Code Review Assignment
One practical team-management lesson from my notes was that code review should also be planned.
The same person should not necessarily be assigned every review.
A healthy team workflow considers:
who has expertise in the area
reviewer availability
workload distribution
avoiding bottlenecks
So code review is not only a technical process.
It is also part of team coordination.
36. Git Stash — One of My Most Useful Lessons
This was one of my favorite practical scenarios.
I had modified some code.
But I hadn't committed it.
Then I needed to switch/create another branch.
Git stopped me:
Please commit or stash your changes
The problem was:
My current work
      +
Unfinished changes
      +
Need to switch branch
I didn't necessarily want to create a commit for unfinished work.
So I learned:
git stash
This temporarily stores the changes and gives me a clean working directory.
I could then switch branches.
Later:
git stash pop
and the changes could be brought back.
The official Git documentation describes stash as a way to temporarily store local modifications so the working directory can be cleaned without committing unfinished work.
Easy way to remember:
git stash
=
"Put my unfinished work somewhere safe temporarily."

git stash pop
=
"Bring that work back."
37. git stash Commands
Some useful commands include:
git stash
Create a stash.
git stash list
See available stashes.
git stash pop
Restore the latest stash and remove it from the stash list.
git stash apply
Apply a stash without removing it.
git stash drop
Remove a stash.
38. Git Reset
Then came one of the more confusing concepts:
git reset
Git reset can move the branch/HEAD to another state and can also affect the staging area and working tree depending on the mode.
The three modes I focused on were:
             Commit   Staging   Files
--soft          ❌        ✅       ✅
--mixed         ❌        ❌       ✅
--hard          ❌        ❌       ❌
39. git reset --soft
Example:
git reset --soft HEAD~1
This removes the latest commit from the branch history while keeping the changes staged.
Useful when:
the commit message was wrong
you want to combine commits
you want to undo the last commit but keep the code
Then you can create another commit:
git commit -m "Correct commit message"
40. git reset --mixed
This is the default reset mode.
It moves the branch back while leaving the file changes in the working directory, but they are no longer staged.
Conceptually:
Commit removed
Staging removed
Code remains
41. git reset --hard
This is much more destructive to the current working state.
For example:
git reset --hard COMMIT_ID
can move the branch back to that commit and discard changes from the index and working tree.
This is where I had one of my most important Git learning moments.
I saw later commits disappear from normal git log output.
And I learned not to panic.
42. git reflog — The Recovery Lesson
After using:
git reset --hard
the later commit was no longer visible in the normal branch history.
But Git keeps a record of HEAD movements.
That's where:
git reflog
became important.
It can show previous HEAD positions, including commits that are no longer reachable from the current branch tip.
Conceptually:
Commit A
   ↓
Commit B
   ↓
Commit C
After reset:
Commit A
   ↓
Commit B

C is no longer the current branch tip
But:
git reflog
can help locate where HEAD previously pointed.
My biggest lesson here:
"Not visible in
git log" does not automatically mean "immediately gone forever."
43. git log vs git reflog
This distinction became very useful.
git log
Shows the commit history reachable from the current branch/reference.
git reflog
Shows movements of references such as HEAD over time.
So:
git log
=
"What commits are in my current history?"

git reflog
=
"Where has HEAD/reference been?"
44. git reset vs git revert
These commands can sound similar, but they represent different approaches.
git reset changes the branch's history/state.
git revert creates a new commit that reverses the effect of an earlier commit.
This distinction becomes particularly important when working with shared branches.
45. The GitHub Workflow I Understand Now
After going through these concepts, the workflow makes much more sense to me.
JIRA TICKET
     ↓
CREATE BRANCH
     ↓
DEVELOP
     ↓
git status
     ↓
git diff
     ↓
git add
     ↓
git commit
     ↓
git push
     ↓
PULL REQUEST
     ↓
CODE REVIEW
     ↓
┌───────────────────┐
│ Changes Requested │
└─────────┬─────────┘
          ↓
       FIX CODE
          ↓
       PUSH AGAIN
          ↓
       REVIEW AGAIN
          ↓
       APPROVAL
          ↓
        MERGE
          ↓
       DEVELOP
          ↓
   RELEASE BRANCH
          ↓
       TESTING
          ↓
       RELEASE
This is where Git stopped looking like a collection of commands and started looking like a development workflow.
46. The Biggest Lesson: Errors Are Teachers
Looking back, some of the most useful things I learned came from errors.
Error 1
main branch doesn't exist
Lesson:
Understand your current branch.
Error 2
Authentication failed
Lesson:
Understand Git authentication and credentials.
Error 3
! [rejected] main -> main (fetch first)
Lesson:
Understand local vs remote history.
Error 4
refusing to merge unrelated histories
Lesson:
Understand commit history and common ancestors.
Error 5
CONFLICT
Lesson:
Understand how Git handles conflicting changes.
Error 6
Please commit or stash your changes
Lesson:
Understand when unfinished work should be stashed instead of committed.
Error 7
My commit disappeared after reset --hard
Lesson:
Understand HEAD, reset and reflog.
47. From GitHub Desktop to Command Line
This is probably the biggest personal shift in this learning journey.
GitHub Desktop had already introduced me to GitHub.
But when I started using commands, I started understanding what those GUI actions actually represented.
For example:
GUI Button
    ↓
Underlying Git command
    ↓
Repository state changes
Instead of simply thinking:
"Click Push."
I started thinking:
"What branch am I on? What commit am I pushing? Which remote am I targeting? Is the remote ahead? Is my authentication configured?"
That is a completely different level of understanding.
48. Git Is Not Just About Memorizing Commands
At the beginning, it is tempting to memorize:
git add
git commit
git push
git pull
But practical Git requires something more.
You need to understand:
STATE
  ↓
COMMAND
  ↓
RESULT
  ↓
ERROR
  ↓
REASON
  ↓
SOLUTION
That is the mindset I want to carry forward.
49. My Git Command Cheat Sheet
Repository
git init
git clone <url>
git remote -v
git remote add origin <url>
Status & Changes
git status
git diff
git log
Snapshot
git add .
git add <file>
git commit -m "message"
Remote
git fetch
git pull
git push
Branches
git branch
git branch <branch-name>
git branch -M main
git checkout <branch>
git switch <branch>
Merge
git merge <branch>
Stash
git stash
git stash list
git stash pop
git stash apply
git stash drop
Reset / Recovery
git reset --soft HEAD~1
git reset --mixed HEAD~1
git reset --hard <commit>
git reflog
SSH
ssh-keygen -t rsa
50. Final Takeaway
I started this learning phase thinking I was revising Git and GitHub.
But I ended up understanding something much more valuable.
Git is not just:
add
commit
push
pull
It is about understanding:
state, history, branches, collaboration, integration, review, recovery and automation.
And the errors I encountered were not interruptions to the learning process.
They were the learning process.
The biggest change in my mindset is this:
Before:
"Which command will fix this?"
Now:
"Why did Git do this?"
And I think that question is much more important.
Because once you understand why, the command usually makes much more sense.
Conclusion
From using GitHub Desktop…
to working through the command line…
to dealing with real Git errors…
to understanding branches, remotes, Pull Requests, code reviews, Jira integration, release branches, stash, reset and reflog…
this journey helped me see Git from a much more practical DevOps perspective.
And this is only one part of the bigger picture.
The next step is taking this workflow further into:
CI/CD → Automation → Testing → Deployment → Infrastructure
If you're also learning DevOps...
I documented the Git & GitHub concepts I learned, including the practical workflow and the real errors I encountered.
If you're trying to understand Git beyond just memorizing commands, I hope this helps. 🚀

